Kathrine, one of D's colleagues and her husband Kim coordinated a cheese making workshop in Achel Belgium at the Catharinadal Kaasmakerij. It is an hour from Brussels and is in the Dutch speaking part of the country.

It was a nice drive and we saw some beautiful scenery along the way.

There is a Trappist brewery at the Monastery of our lady Saint Benedict. It is in the same town as the cheese class so we left early to check it out. The Monastery is in Belgium, but the gardens cross the border into the Netherlands. You could not see or tour the brewery, but they had a great store where you could buy their beer, Achel Beer, and hundreds of others. D was a happy guy!

We brought sandwiches as we did not have enough time to eat at a restaurant and make the class on time. D wanted to eat in the Netherlands, I just wanted to stay in Belgium. So….

We both got our way!
The Catharinadal kaasmakerij (cheese room) is run by two brothers. One owns and milks the cows (just down the street from kassmakerij) and the other brother makes the cheese and runs the shop.

We were a group of 19, 11 adults and 8 kids. Here we all are with Franz, our cheese monger (and teacher).

We had to "dress" for the making of the cheese. They also advised us to wear rubber boots (I am the one in the middle with the red boots).

D is assessing the work station.

We started with raw milk from their cows (no we did not milk the cows). The milk was heated slightly and the first step was to add lactic-acid producing bacteria and stir for 30 minutes.


Cheese is made by curdling the milk. Next, rennet ( a natural enzyme from a young calves stomach to digest the mother's milk) is added.
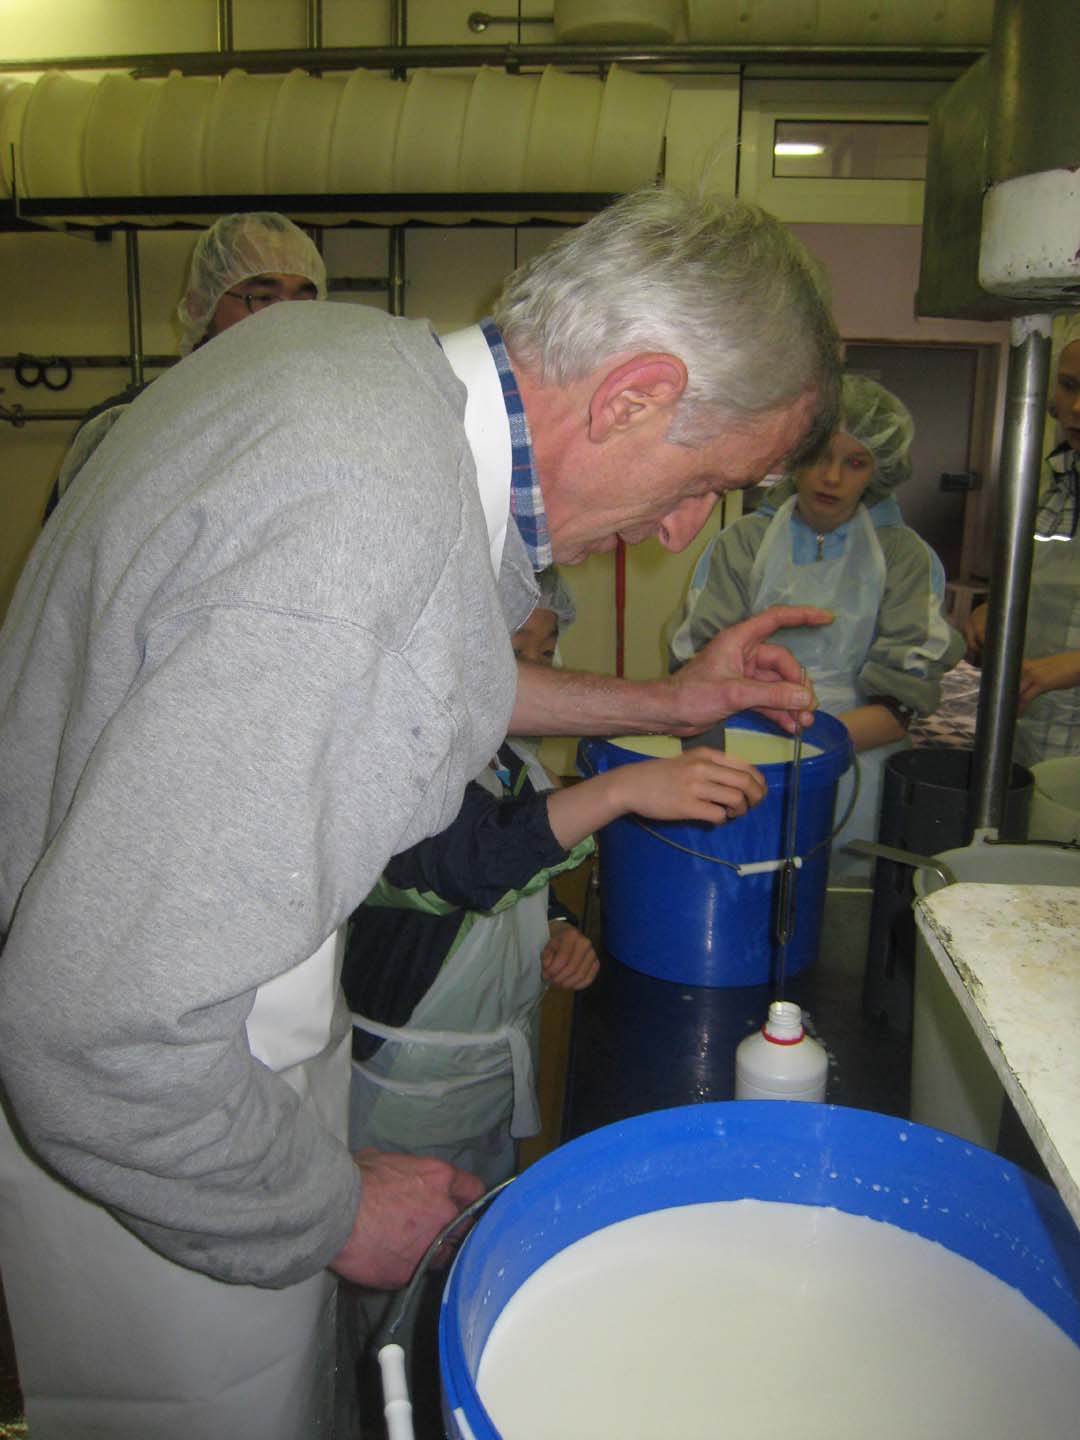

It was amazing how fast it started to thicken. He told us that our milk was warmer than the rest of the groups and this caused our cheese to thicken faster than the rest. We were bummed as we thought it was not going to turn out. He said it would just make ours a little harder vs soft.

Next, we had to break up the curd (the solid element) into very small chucks. To do this we used a special knife called a "harp"

and cut across one way:

and then the other – a cross-hatch style. Donald's colleague Dave said he was going to go back to work and tell everyone he saw D "cut the cheese".

After it got to a certain size, we had to use our hands to break the curd up as small as possible – the size of a pea.
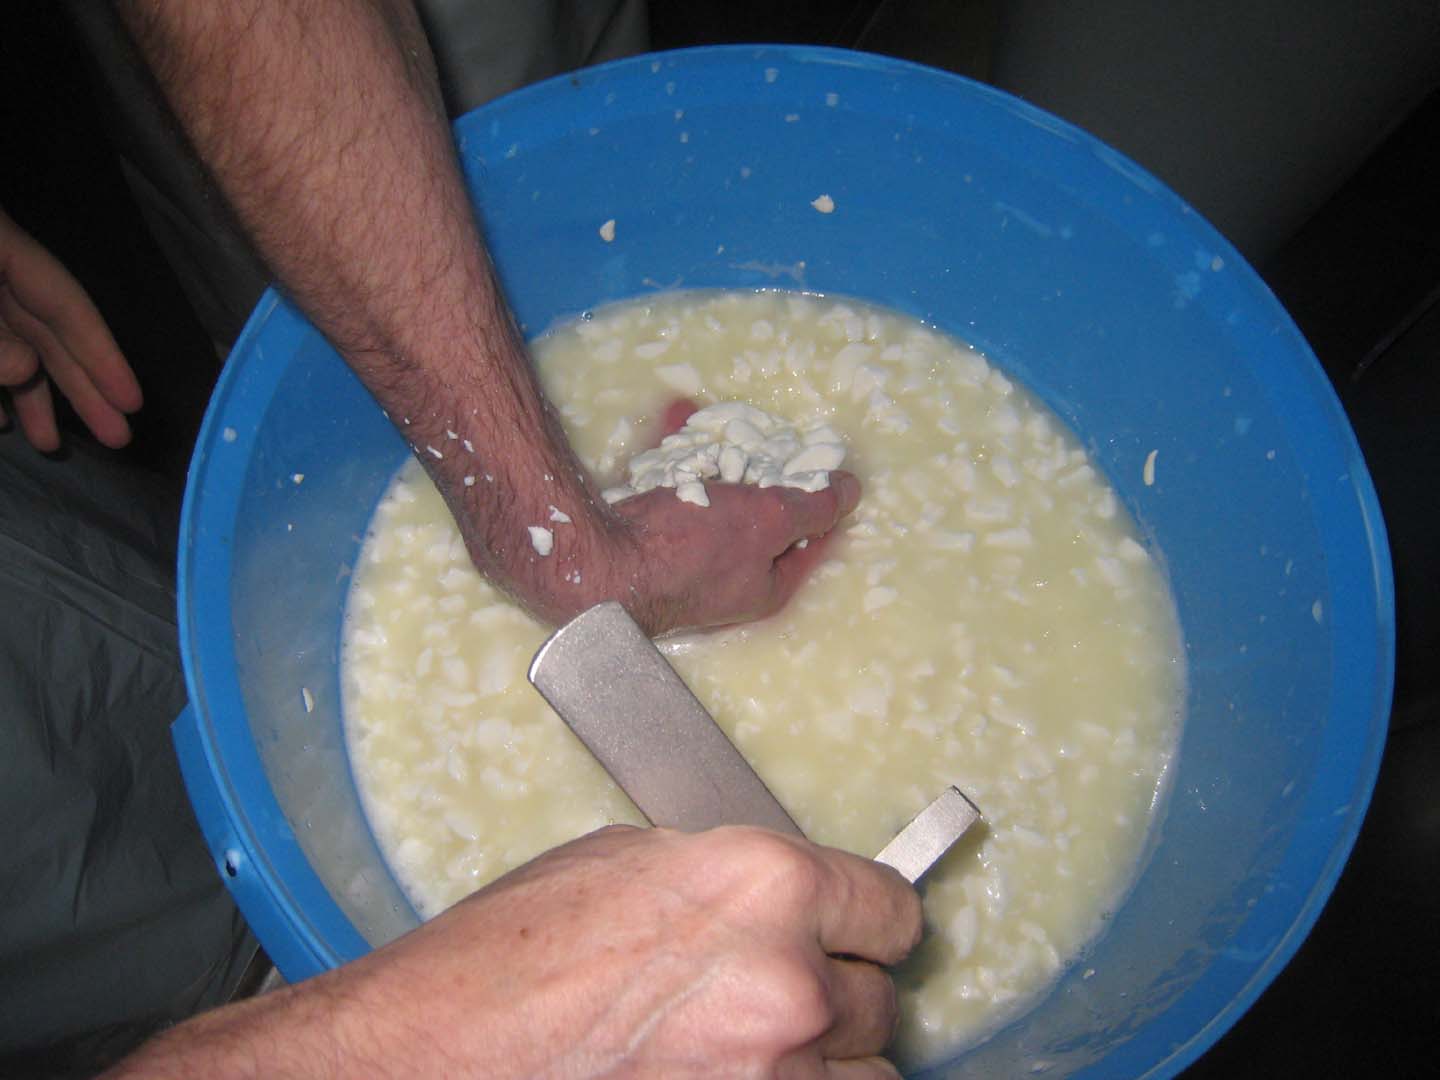
And yes…..I got my hands dirty too!
Looks ready to me!

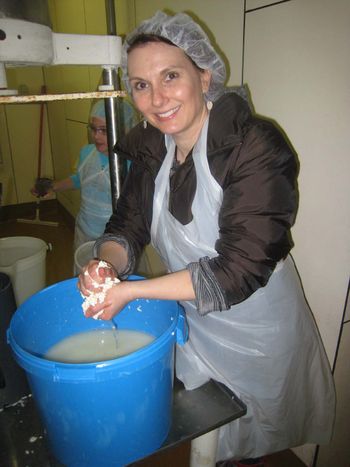
We then had to take out half of the the Whey (liquid) from our bucket, add hot water and gently wash the the curds. The curd is then pressed through a net to get out all of the whey.

It had the texture of ricotta cheese

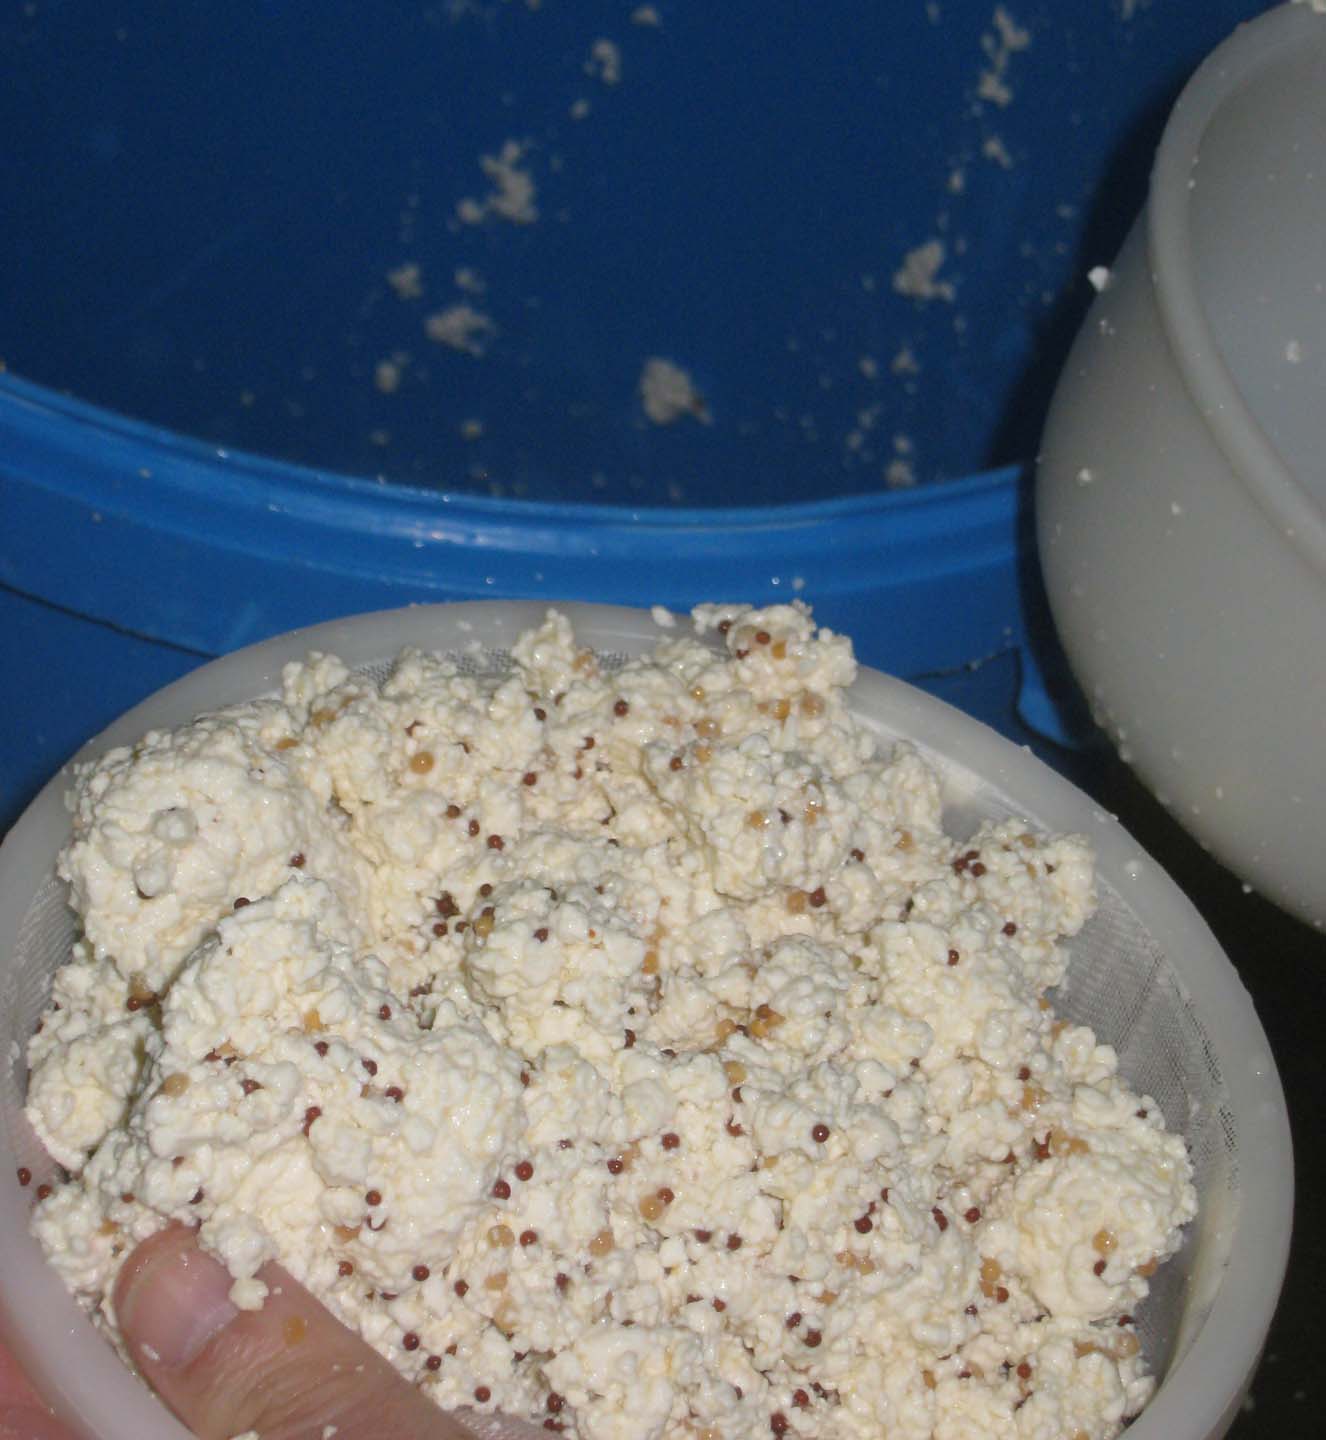
We took a break and tasted several cheeses so we could decide what flavor we wanted to make ours.

We choose horseradish and ginger for one, shown here before mixing in the spices into the curd.

And mustard for the other shown with spices mixed in.

D tasted it to make sure our cheese was "on track".

Next step: to press the curd in to a net which was then placed into a mold.
We had to squeeze as much liquid out as possible.
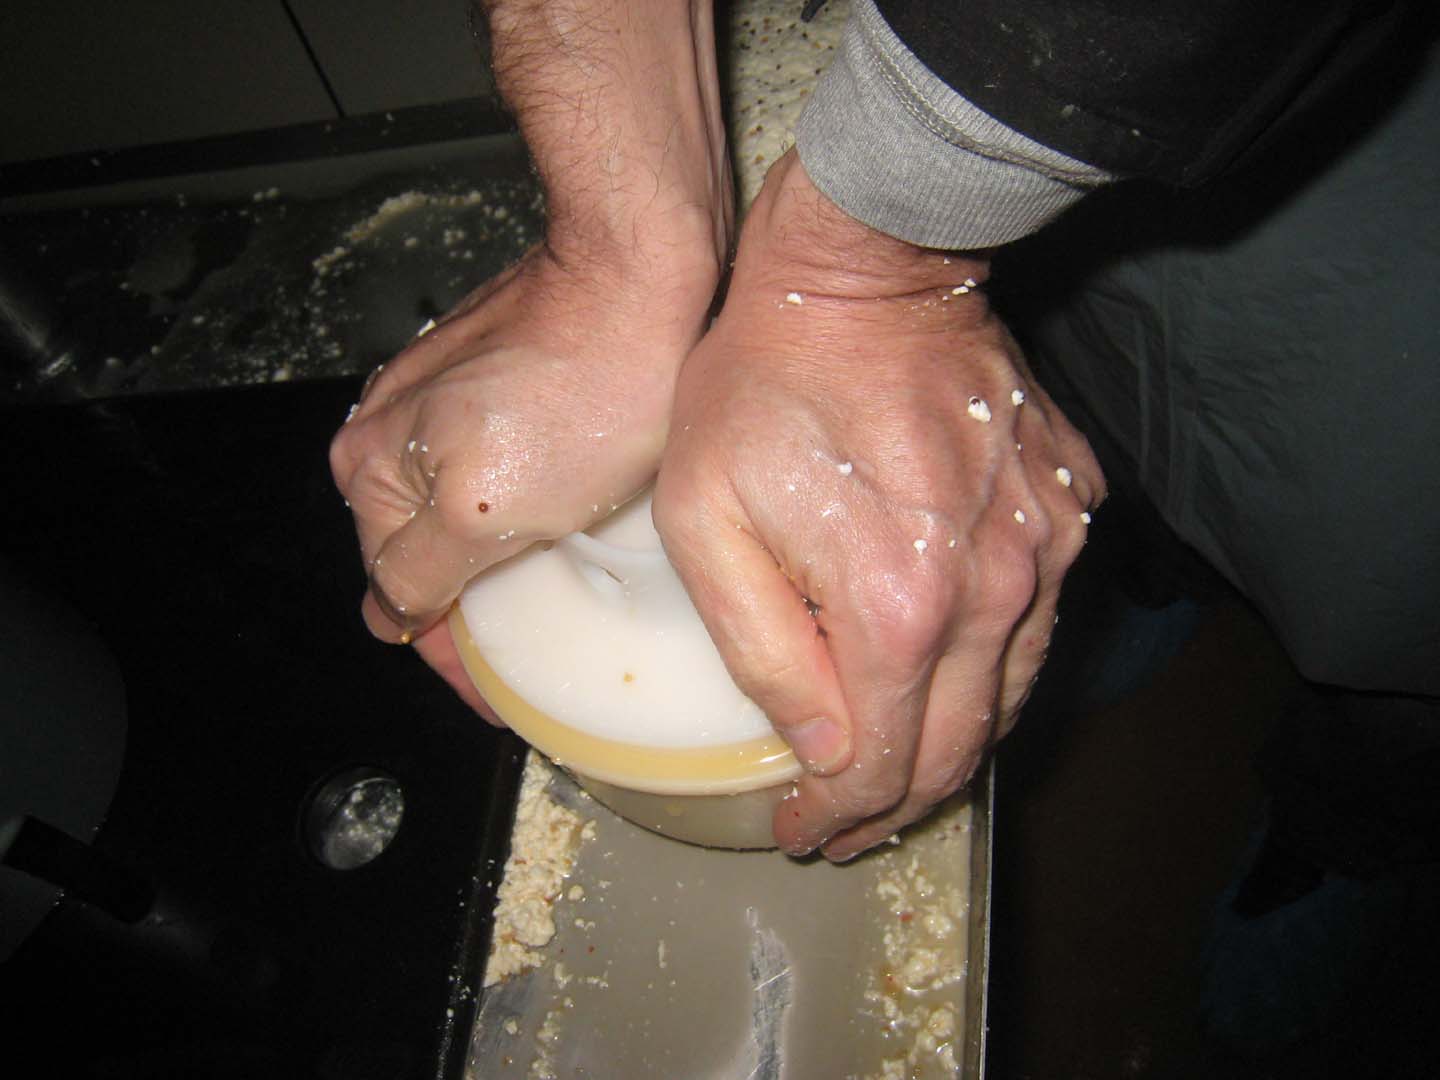
It is then carefully removed from the form (this is where you could see it starting to look like cheese),

and flipped it over and put back into the form upside- down. This was the final step to "making" the cheese. It is ready to be placed in the industrial strength cheese-press.

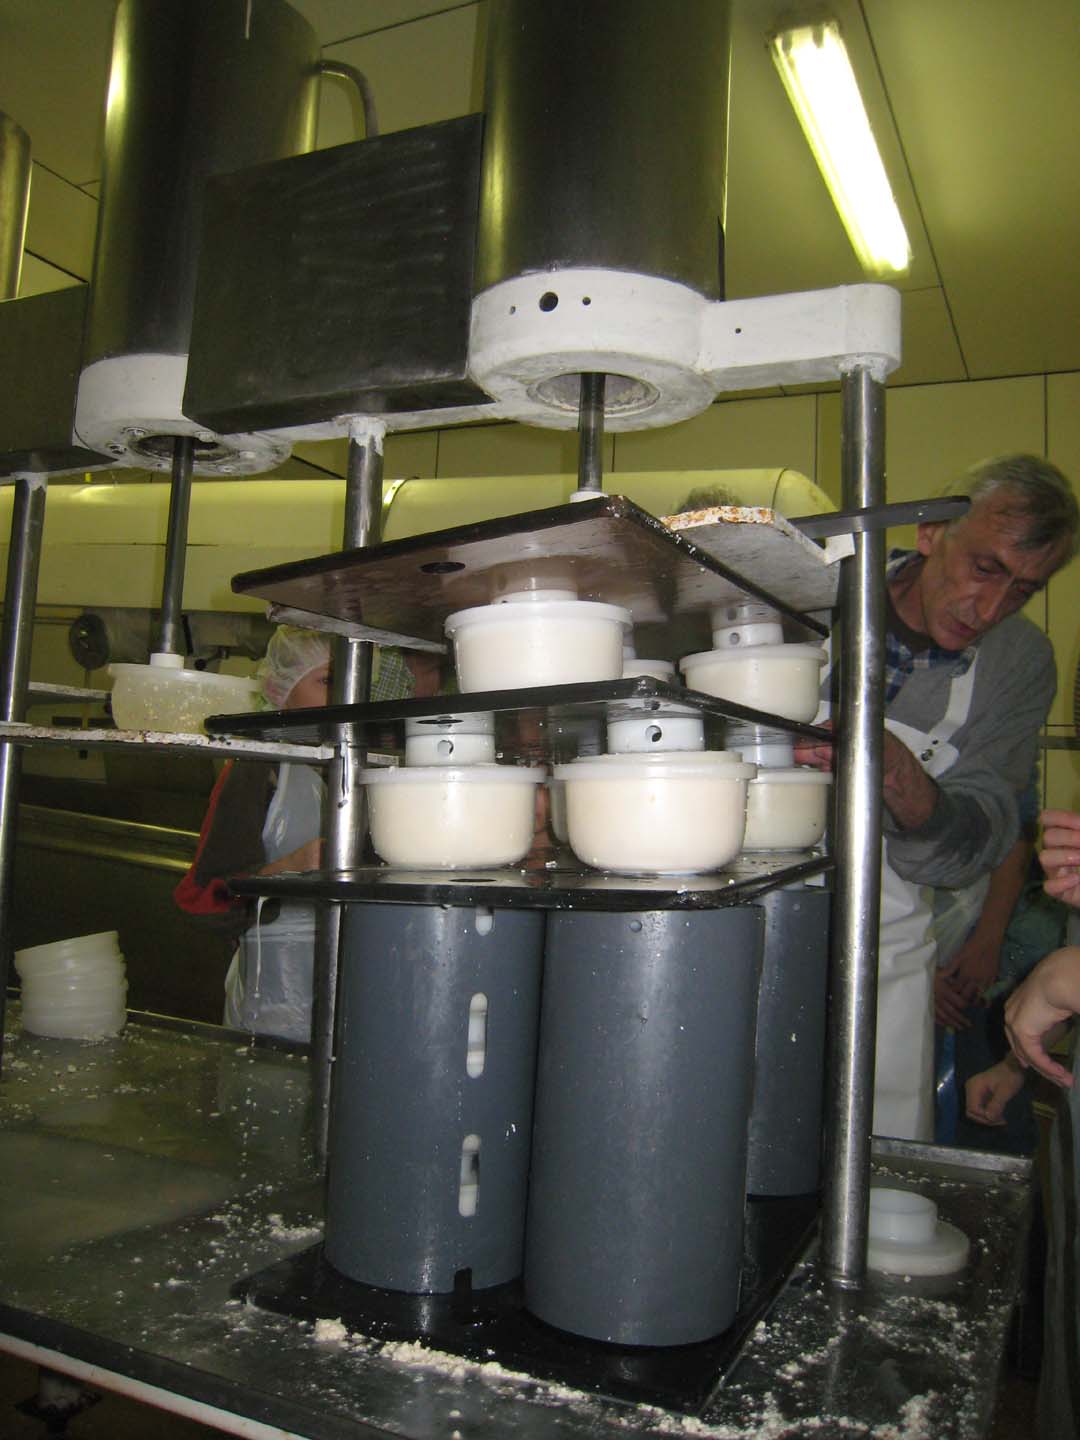
It pressed for about 30 minutes while we all took a break and sampled their yummy desserts. After you took it out of the container, you trimmed the edges.

Voila - Look at this beautiful cheese! And looks like that one came from "Team Ward"!

Franz then showed us how they complete the cheese process and showed us what we needed to do at home. They soak the cheese in a brine (salt water) for 24 hours in large vats. We would need to do the same at home in a pot.

We need to let our cheese dry for 4 days, turning it each day. On the 4th day, we will paint on a wax coating as Franz showed us.

The cheese is now ready for the last stage: maturing. This needs to be done at a temperature of 60 degrees for 6 weeks. Dave rigged up a spot in his basement with an air-conditioner to keep it at the perfect temperature as our apartments are too warm and the refrigerator is too cold. He has graciously offered to "house" anyone's cheese.

So Dave and Drew will babysit our cheese for the next 6 weeks, turning it each day!

The cheese shop had a very large cool room where they matured theirs. We bought several types of their cheese, notice the Dutch names (long!)

We also bought their home-made yogurt and ICE CREAM (speculoos)! Delicious!

Who says I can't become a Belgium farmer?

Leave a comment